Using localhost in your WordPress site enables you to run updates, test plugins, or build your site in private. Here I will teach you how to install WordPress on localhost This means changes in the site won’t be visible to your users.
The conventional method to use the WordPress CMS is to buy a domain and hosting plan and then install it. By following this step-by-step guide, you should be able to download the localhost software, create a database, and install WordPress.
Here you will learn how to configure a website in Localhost and the benefits of configuring a website in Localhost.
In the video, didn’t find what you were looking for? I’ll tell you about a different and detailed process of creating a website on a local computer in the article. Continue reading the article.
Table of Contents
What is Localhost?
Instead of using hosting, the local PC can work as the storage device of your website. You need to install third-party software to use your computer’s storage as a hosting, which creates a virtual environment for installing WordPress.
Why do you need to install WordPress on Localhost?
But, why do we use localhost for our website development as no one can see our site, you can also think localhost is only for beginners who want to start practicing creating websites for free. But the fact is advanced users also use localhost with WordPress to test plugins, themes, and more, before applying it to their live websites to avoid any mistakes.
Options to Install WordPress Locally
There are mainly four most popular localhost softwares to install WordPress locally.
- XAMPP – Cross-platform, Apache, MySQL, PHP, and Perl
- WAMP – Windows, Apache, MySQL, PHP
- MAMP – My Apache, MySQL, PHP
- LAMP – Linux, Apache, MySQL, and PHP
Among all of them, I do recommend XAMPP for installing and managing our websites on Localhost, because of its ease of use and it also offers more features than others.
Here, I use XAMPP for its ease of use and beginner-friendliness.
Steps on How to install WordPress on localhost
Installing WordPress on a local computer is easier than you think. In this post, I will guide you on how to install WordPress on localhost in simple steps.
Step1: Download XAMPP
The first step is to download XAMPP software from Apache friends. Visit here to download XAMPP for Windows, Linux, or OS X.
Now, click on the appropriate button as per your operating system. Wait for a while, the file size will be around 150MB.
Step2: Install and Run XAMPP
Great, you have successfully downloaded the software. Now, it’s time to install and run XAMPP on your computer.
After finishing the download, select the installer/.exe file, or click on it twice, and soon the installation process will begin if any warning message pops up click on OK, and it will enter into the installation process.
- Click on the next button.
- Next, some checkboxes will be checked You just need MySQL and phpMyAdmin, so unmark the other boxes.
- Next, choose a folder location where to install the software. I suggest leave it as it is. and click on the next button.
- Now, the default language will be selected as English. You can change the language from here and click on the next button.
- Then again click on the next button.

- To finish the installation process. Click on the Finish button.
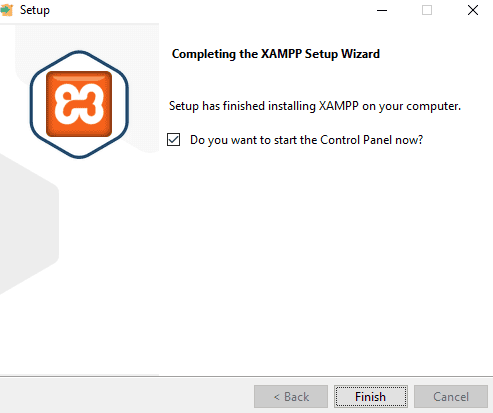
After finishing the setup the XAMPP control panel will open. To run WordPress we need to run Apache and MySQL modules. Click on the start button for both of the modules. Ensure these modules should turn green once you enable them.
Step3: Download WordPress
In the case of a live website, you can directly install WordPress on your domain from your hosting provider.
But for localhost, you need to download WordPress on your PC from WordPress’s official website and unzip the downloaded zip file.
Add the WordPress files
- Create a new folder on C drive -> xampp -> htdocs.
Note: The name of the folder will be the sub-name used to access your website.
- Now, copy and paste all the unzipped files and folders into your targeted folder under the htdocs folder.
Note: In the browser’s address bar, you must enter the name of that folder created within the “htdocs” folder to access your website on localhost.
Step4: Create a Database for your website's files
At this point, you have downloaded and installed WordPress on localhost successfully. Now, it’s time to create a database for your WordPress website.
- Firstly, run the XAMPP control panel.
- click on the Start Apache and MySQL button.
- Click on the admin button next to the Mysql button.
Now, a new window will open on the browser.
- Click on the New button from the database tab.
- Enter the database name and click on the Create button.
Note: I suggest giving the database name related to your website for later operating purposes.
Step5: Install and Run WordPress on Localhost
Alright, now visit your website through your browser by typing http://localhost/foldername
- Firstly, select the language. By default “English” language will be selected. Click on the Continue button.
- Click on Let’s Go! button.
- Now, on the next screen Enter the Database Name, Username – “root”, Password – keep it blank, Database Host and Table Prefix – leave these fields as it is then click on the Submit button.
- Click on the Run the installation button.
- Now, in the welcome screen enter your Site Title, Username – I recommend “admin”, Password – I recommend “admin”, Your Email – Enter your email id here. Search engine visibility – I recommend not to tick this option and then click on the Install WordPress button.
- Now, a success screen will appear. Here click on the Log In button.
Great, you have now successfully installed WordPress on your local computer.
To, run the website just type on the browser http://localhost/foldername after opening the XAMPP control panel and then start Apache and MySQL modules.
For building websites without coding read my article on how to create WordPress websites.