When you are reading this article I assume you already purchased a domain (suppose from Godaddy) and want to host your website on a different web hosting server. Here in that article, I’ll explain how to connect simply change domain name server Godaddy.
In the video, you didn’t find what you were looking for? Continue reading the article.
In order to change domain name server godaddy follow the below metioned steps.
Table of Contents
Step 1: Login to your godaddy's account
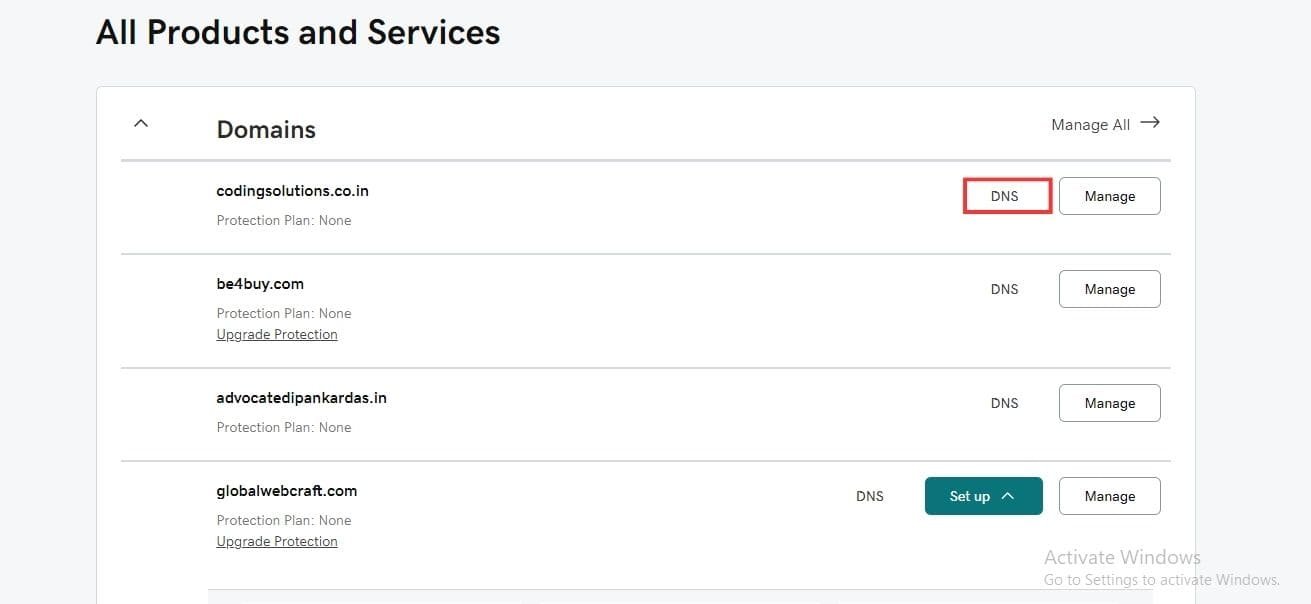
Step 2: Click on DNS button
Under the All Products section click the DNS button beside the particular domain to which you want to change the DNS records
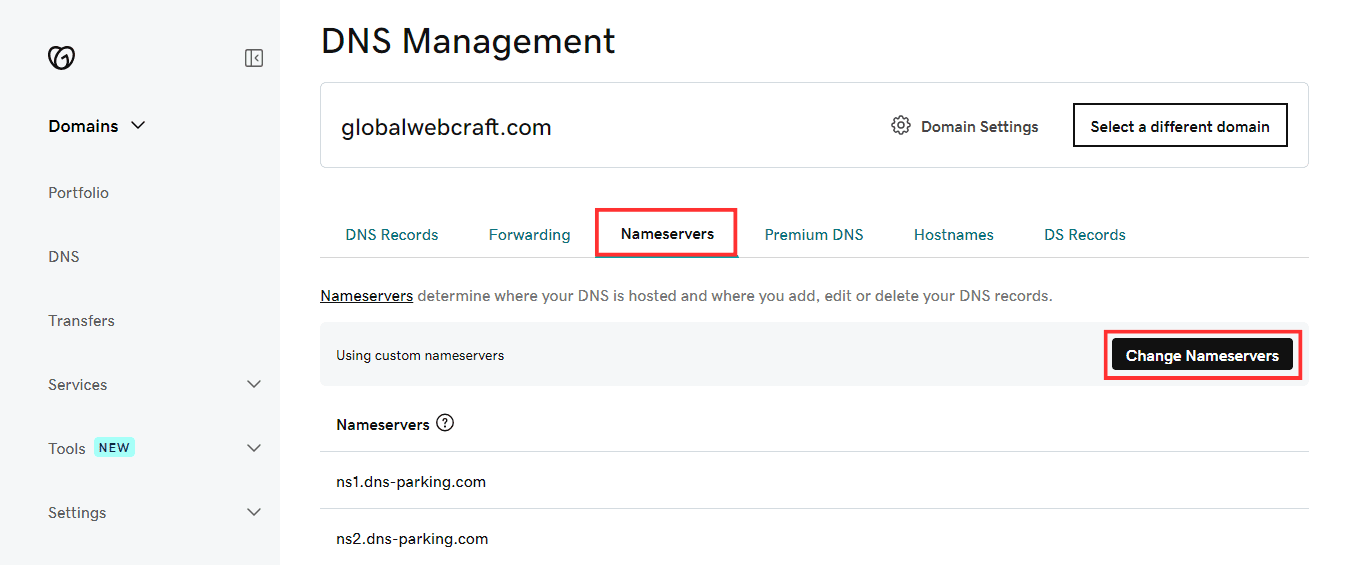
Step 3: Click on 'Change Nameservers' button
Select ‘Nameservers’ and then click on the ‘Change Nameservers’ button
Step 4: Enter two line of code provided by your hosting
A popup will now be visible. By default, Godaddy nameservers are selected. Select I’ll use my own nameservers

Click the Save button. This is how you can connect your domain name with your hosting servers.
In every hosting, you need to find the nameservers you will always have the option to add a domain name just follow that and in the end, you will get the nameservers.
Here I’m showing you on Godaddy but other providers might have the way a little bit different but all of them have the option to add your custom nameservers.
NOTE: Wait till it gets activated with new nameservers. They say it will take up to 24 hours after saving the new domain name servers, but in most cases, it takes just 10 to 30 minutes.
Read the article to learn how to create a website in 30 minutes or Read my articles to find your specific query.